
For most Linux users, sudo is a magical tool that lets you run any command as root (or even switch to the root user). So why not configure sudo to your liking? That’s what we’re going to delve into in this blog post!
Ubuntu, Debian and other distros come preconfigured with sudo in a way that allows a provisioned user to run any command as root. But sudo can be configured by a sysadmin to allow users in a certain group so that they can only run the a command with sudo. Those users won’t be able to run any other command with sudo nor switch to the root user.
In this blog, you’ll see how you can tweak different aspects of sudo.
PLEASE be careful with tweaking your sudo configuration! You could dork your system or lock yourself out from running sudo. Make a system settings backup so that you can back out if needed.1. Always use visudo for editing sudo config
The sudo command is configured through the /etc/sudoers file. While you can edit this file with your favorite terminal-based text editor like vim, don’t do it — trust me!
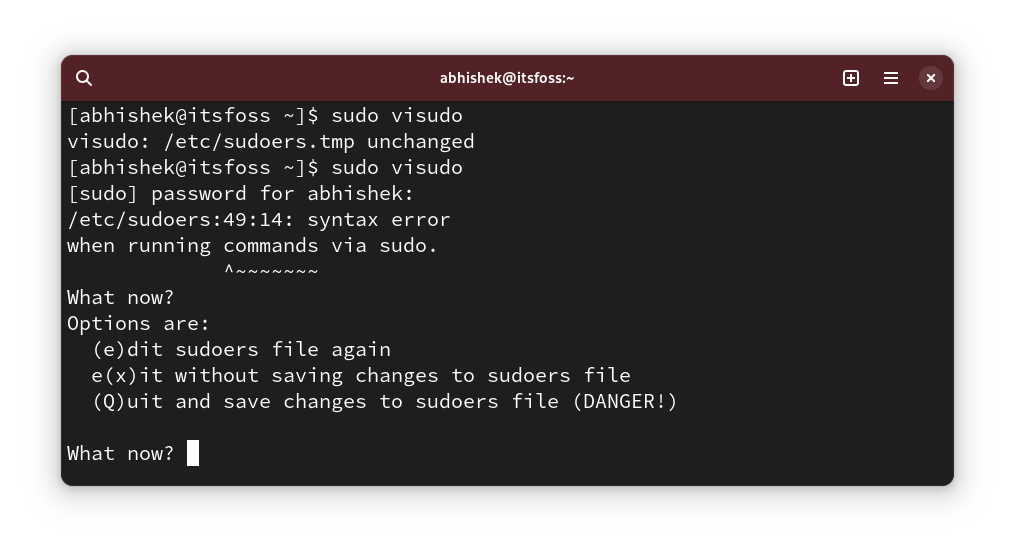
Why? Because any incorrect syntax in this file will leave you with a dorked sudo configuration. And, this could render your Linux system useless.
Just use it like this: sudo visudo
The visudo command traditionally opens the /etc/sudoers file in the vi (or vim) editor. Ubuntu defaults to opening in the nano editor.
The advantage here is that visudo performs a syntax check when you try to save your changes. This ensures that you don’t mess up the sudo configuration due to incorrect syntax.
💡Make a backup of the /etc/sudoers file right now! In that way, if you are unsure what changes you made or you need to revert to the default sudo configuration, you can just copy it from the backup.
sudo cp -v /etc/sudoers /etc/sudoers.bak
2. Show asterisks while entering password with sudo
This behavior is inherited from UNIX. When you enter your password for sudo in the terminal, it doesn’t display anything. This lack of visual feedback makes new Linux users think that their system is non-responsive. Unix aficionados say this is a security feature. Some distributions, like Mint, have sudo tweaked in a way that it displays asterisks when you enter a password.
To show asterisks with sudo, run sudo visudo and look for the line:
Defaults env_resetChange it to:
Defaults env_reset,pwfeedback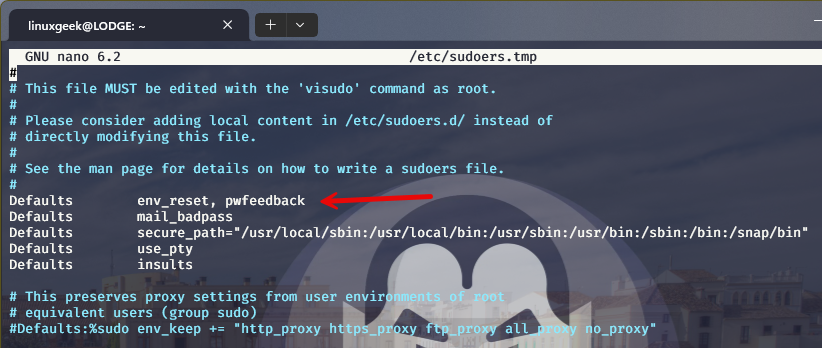
💡If you do not find the Defaults env_reset line, just add a new line with text Defaults env_reset, pwfeedback to the file.
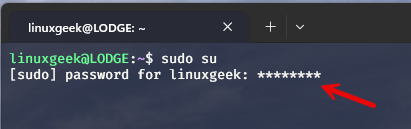
Now, if you try using sudo and it asks for a password, you should see asterisks when you enter the password:
✋If you notice any issues with password not being accepted even when correct with graphical applications like software center, revert this change. Some old forum posts mentioned it. I haven’t encountered it though.
3. Increase sudo password timeout
By default, when you use sudo for the first time you are prompted to enter your password. For any subsequent commands entered with sudo, you don’t have to enter the password for a certain time period. Different distributions have different timeouts. It could be 5 minutes or 15 minutes.
You can change the behavior and set a sudo password timeout of your choice. Just edit the sudoer file and look for the line with Defaults env_reset and add timestamp_timeout=XX to the line so that it becomes this:
Defaults env_reset, timestamp_timeout=XXWhere XX is the timeout in minutes.
If you had other parameters like the asterisk feedback you saw in the previous section, they can be combined:
Defaults env_reset, timestamp_timeout=XX, pwfeedback💡Similarly, you can control the password retries limit. Use the passwd_tries=N to change the number of times a user can enter an incorrect password.
4. Use sudo without password
So you increased the sudo password timeout. Increasing the timeout is one thing. The other thing is to not use a password at all!
Yes, you read that right. You can use sudo without entering the password.
That sounds risky from security perspective, right? You are right! But there are genuine cases where you can increase productivity by using sudo without password.
For example, if you manage several Linux servers remotely and you have created sudo users on them to avoid escalating to root all the time. You might be tempted to use the same sudo password for all your servers. Not exactly secure is it?
You can set up key-based SSH access to the servers and allow using sudo without password. This way, only the authorized user access the remote server and sudo password doesn’t need to be remembered. YOu can also allow this on only a per user basis. Open the /etc/sudoer file for editing with:
sudo visudo
user_name ALL=(ALL) NOPASSWD:ALL
Of course, you need to replace the user_name with actual user name in the above line. Save the file and enjoy sudo life without passwords 🤠!
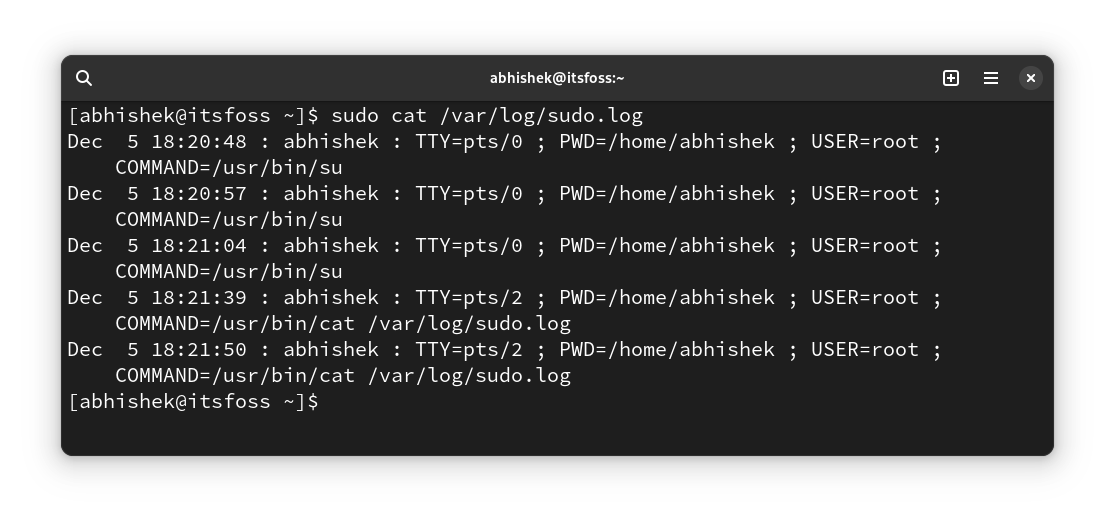
5. Create separate sudo log files
You can always read the syslog or the journal logs for sudo related entries. But why not have a separate entry for sudo by creating a custom log file dedicated to sudo? You can!
Let’s say, you want to use /var/sudo.log file for this purpose. You don’t even need to create the new log file in advance, as it will be created automatically if it does not already exist.
Edit the /etc/sudoers file using visudo and add the following line:
Defaults logfile="/var/log/sudo.log"Save it and you can start seeing which commands were run by sudo at what time and by what user in this file:
6. Only allow a certain commands with sudo to a specific group of users
This is more of an advanced solution that sysadmins employ in a multi-user environment where people across the organization work on the same server.
A developer may need to run web server or some other program with root permission but giving them complete sudo access will be a security issue.
While this can be done at user level, it makes more sense to do it at group level. Let’s say you create a group called devs and you allow them to run the commands (or binaries) from the /var/www and /opt/bin/devs directories and the inxi command (binary /usr/bin/inxi).
Simply edit the sudoer file with sudo visudo and add the following line:
%coders ALL=(ALL:ALL) /var/www,/opt/bin/devs,/usr/bin/inxiYou can even add the NOPASSWD parameter so that sudo for the above allowed commands can be run with sudo but without entering a password.
7. Check the sudo access for a user
Alright! This one is more of a tip than a tweak.
How do you know if a user has sudo access? Check if they are member of the sudo group, you say. But that’s not a guarantee. Some distros use wheel group name instead of `sudo`.
A better way is to use the built-in functionality of sudo and see what kind of sudo access a user has:
sudo -l -U user_nameIt will show if the user has sudo access for some commands or for all commands.
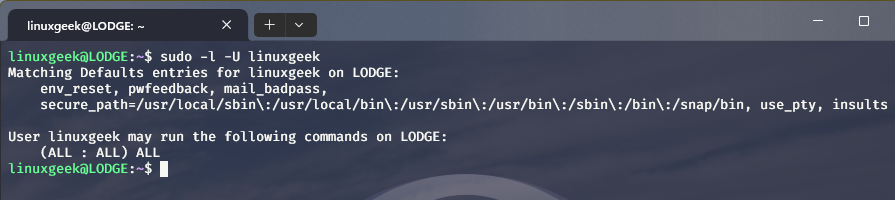
As you can see above, it shows that I have a custom log file and password feedback on apart from sudo access for all commands. If the user doesn’t have sudo access at all, you’ll see an output like this:
User linuxgeek is not allowed to run sudo on this LODGE.🎁 Bonus: Let sudo insult you for incorrect password attempts!
This one is the ‘useless’ but ‘fun’ tweak! Have you ever mistyped the password while using sudo some time in the past?
This little tweak allows sudo to insult you for entering incorrect passwords!
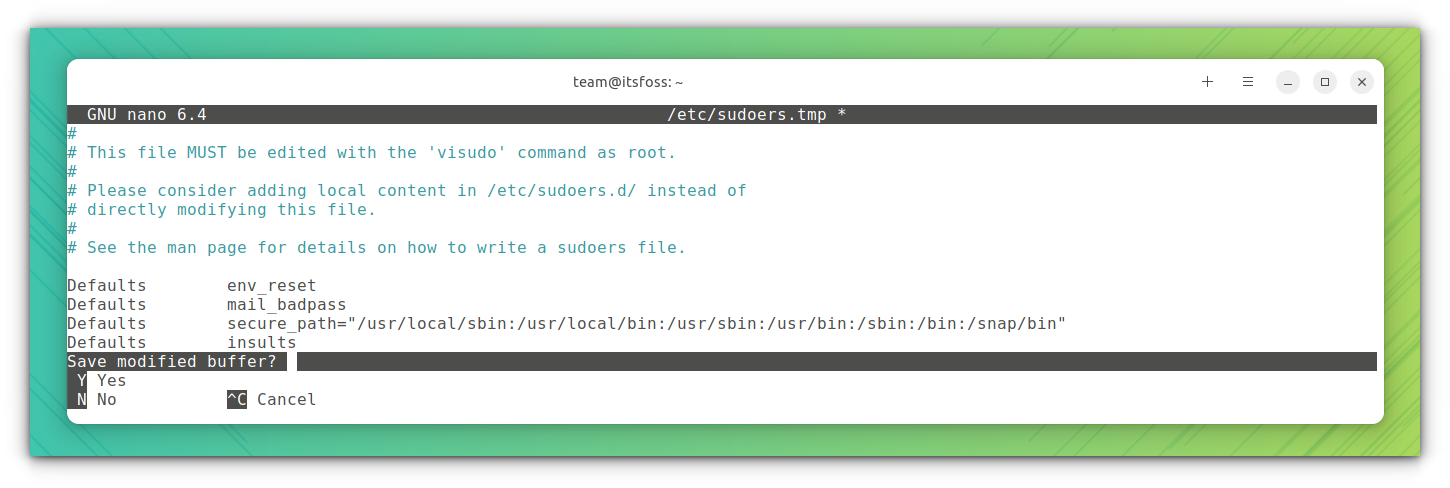
Use sudo visudo to edit the sudo config file and add the following line to it:
Defaults insultsAnd then you can test the changes by entering incorrect passwords:

Fun, right!
Enjoy your new found knowledge and sudo skills!
Leave a Reply
You must be logged in to post a comment.